

ご無沙汰しております!園部です。
「IoTのためのクラウドシステム構築」の続きです。今回はセンサデータに基づいたメール通知をやっていきます!
◇ 全体の流れ
-
SNS(Simple Notification Service)のトピック、サブスクリプションを設定をする
-
Lambda関数を作成する
-
IoTCoreのルールを設定する
-
Lambda関数でSNSへデータを連携するプログラムを実装する
-
センサデータをAWSに送るプログラムを作成し、実行する
※ 前提としてAWSアカウントは持っているものとします
SNSはシンプルなメッセージングサービスです!
Lambdaはサーバーレスコンピューティングにより手軽にコード実行ができるサービスです!
詳しくはAWSのページをご覧ください。
SNS:https://aws.amazon.com/jp/sns/
Lambda:https://aws.amazon.com/jp/lambda/
1.SNS(Simple Notification Service)のトピック、サブスクリプションを設定をする
1-1.トピックの作成
-
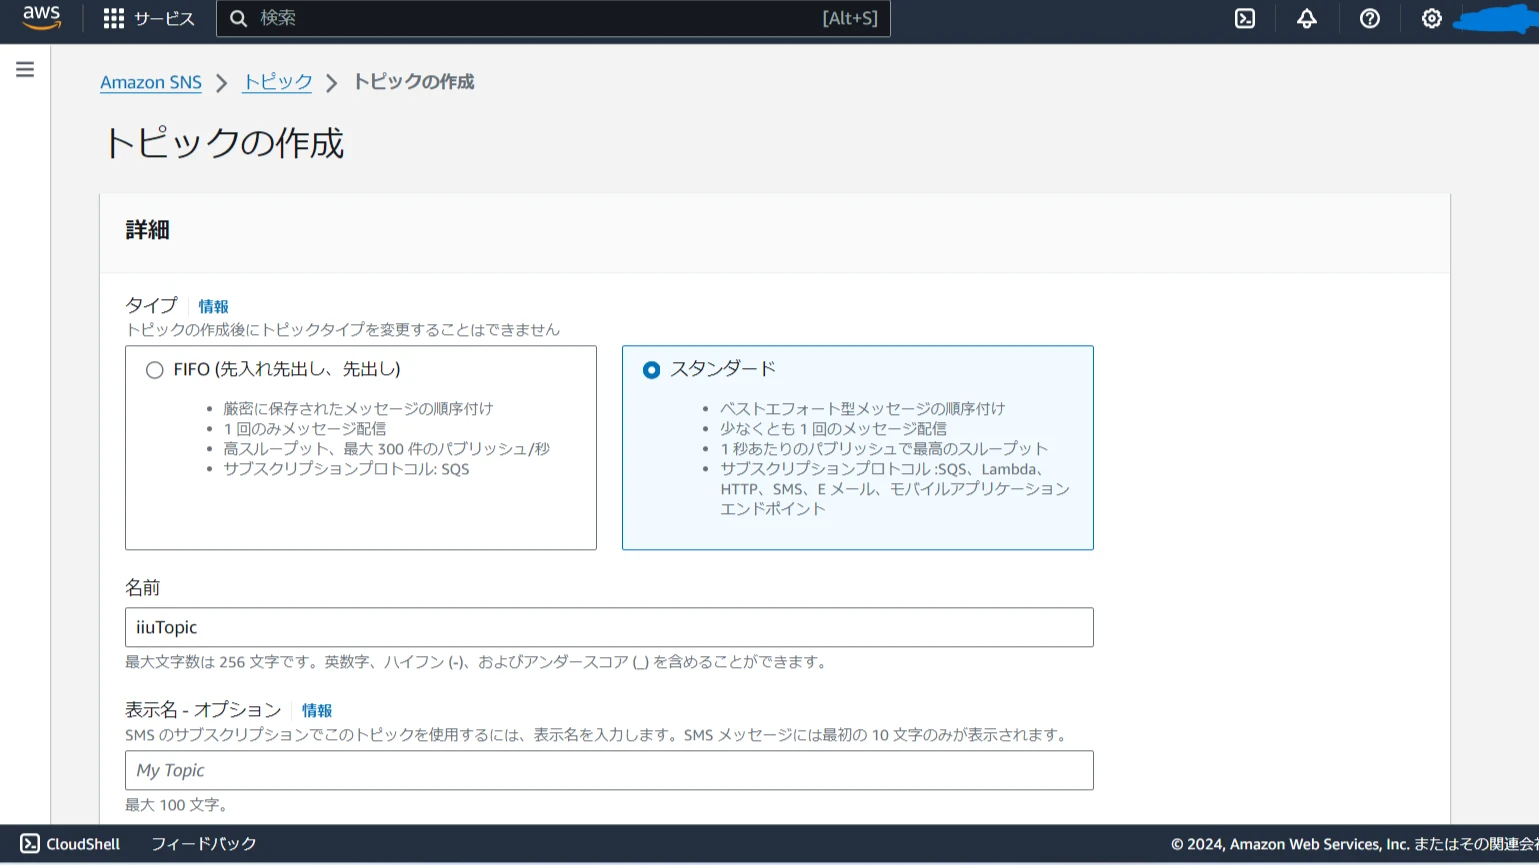
SNSの画面に行き、左メニューからトピックを選ぶ
-
トピックの作成ボタンを押下
-
トピックのタイプは”スタンダード”を選択し適当な名前を付ける
-
“トピックの作成”ボタンを押下
-
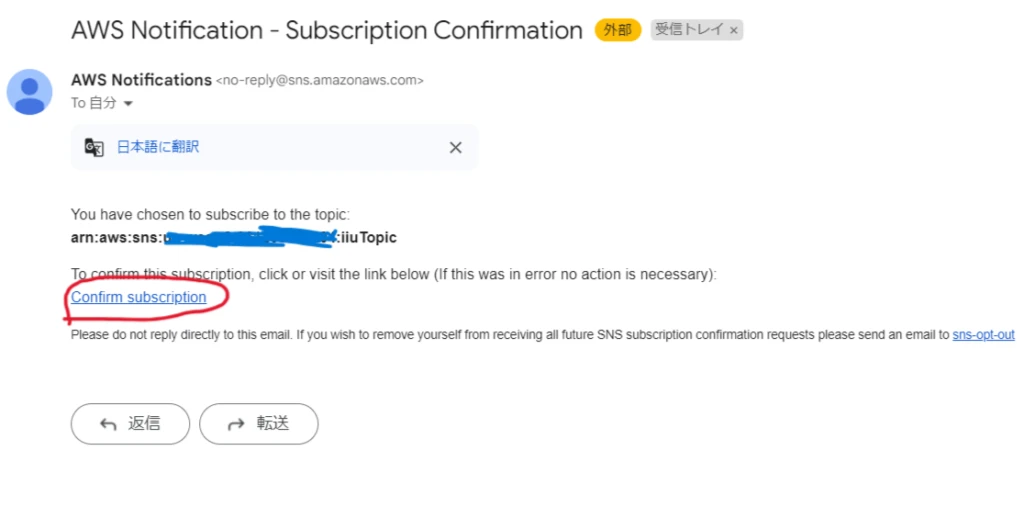
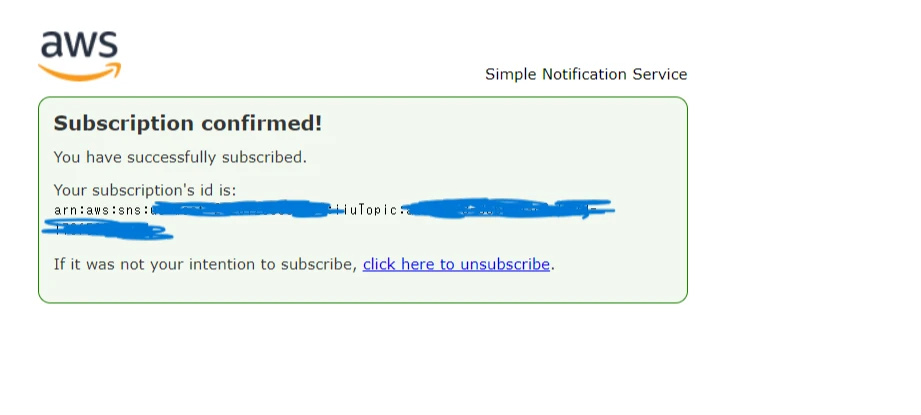
記入したアドレスに確認メールが届くので、確認する
1-2.サブスクリプションの作成
-
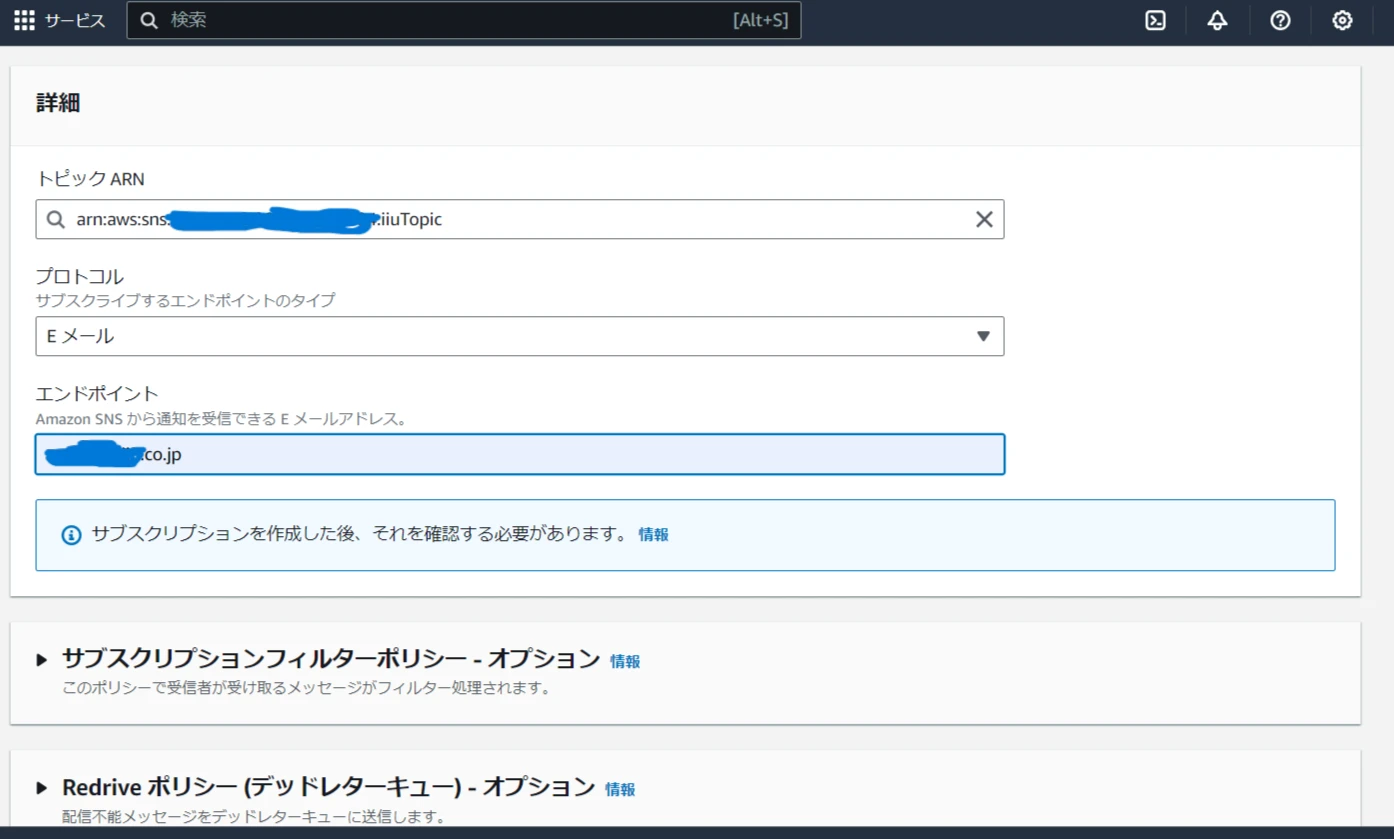
作成したトピックのページを開き、”サブスクリプションの作成”ボタンを押下
-
プロトコルの選択リストからEメールを選択
-
エンドポイントのテキストボックスに、メールの送り先アドレス(自分が確認できるアドレス)を入力
-
サブスクリプションの作成ボタンを押下
サブスクリプションの作成
2.Lambda関数の作成
-
Lambda画面を開き、左メニューから関数を選択
-
関数の作成ボタンを押下
-
一から作成を選択した状態で、関数名を入力。ランタイムのリストからpythonを選択(今回は3.9)し、アクセス権限の”デフォルトの実行ロールの変更”で既存のロールを使用するを選ぶ。既存のロールリストから適当なロールを選択(SNSとIoTCoreへのアクセス権限があるもの)
-
関数の作成ボタンを押下
3.IoTCoreのルールを設定する
-
左のメニューを開いて”メッセージのルーティング”>”ルール”を押下
-
”ルールを作成”ボタンを押下
-
”ルール名”を適当に入力し、”次へ”を押下
-
”SQLステートメント”に「SELECT * FROM ’トピック名’」を記入
-
”ルールアクション”で”Lambda”を選択
-
関数名リストから自分が作成したLambda関数を選択し、”次へ”を押下
-
“ルールの作成”ボタンを押下
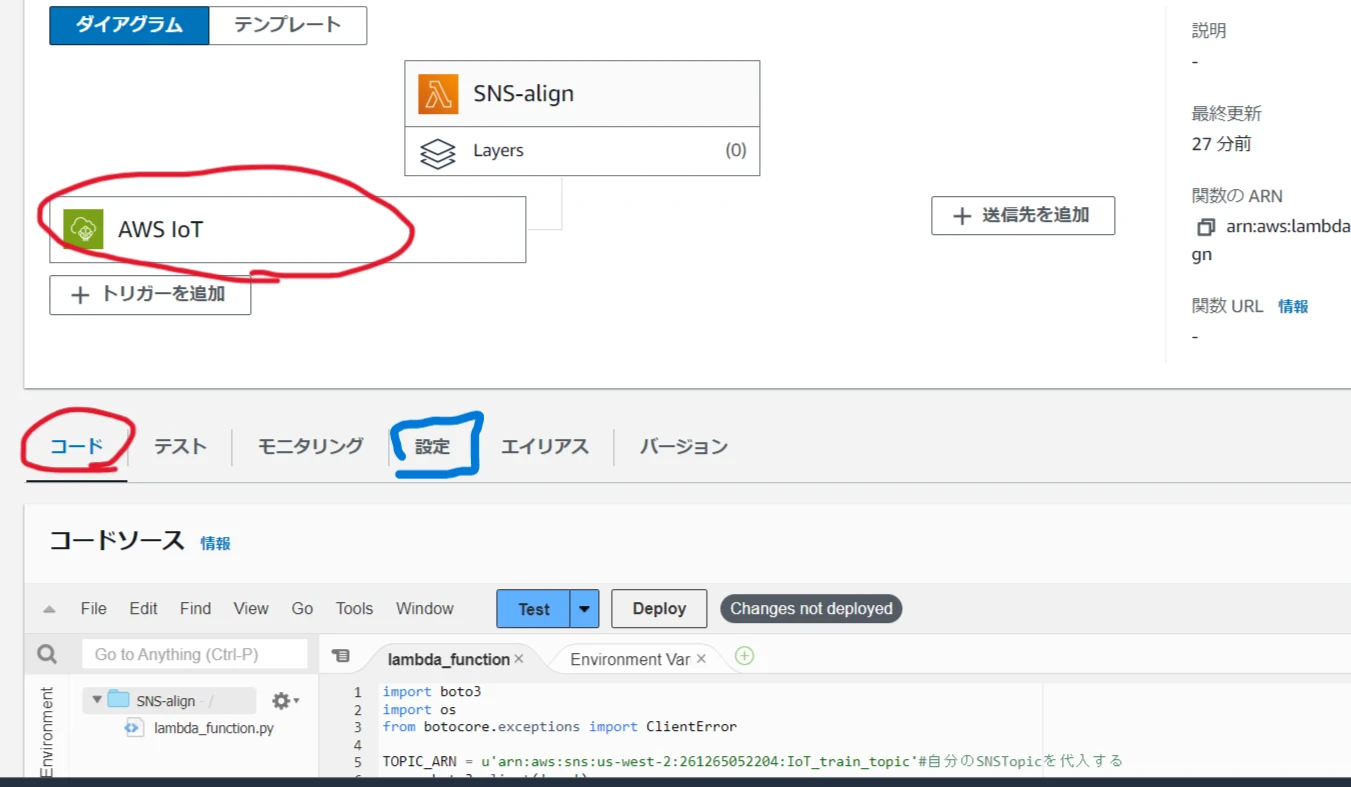
Lambda関数プログラム実装
4.Lambda関数でSNSへデータを連携するプログラムを実装する
-
Lambda画面でコードを選択し、コードソースから”lambda_function.py”を選択する。(lambda_handlerメソッド内が実際に実行される)
-
実行プログラムを作成する(下記参考)
-
FileからSaveを選び保存。Deployボタンで実装
-
作成ボタンを押しルール作成完了
-
設定タブを選択し、環境変数を開く
-
環境変数の追加ボタンを押下し、キーに”Alert_Trigger”、値に”True”を入力し保存ボタンを押下(下記プログラムを使った場合)
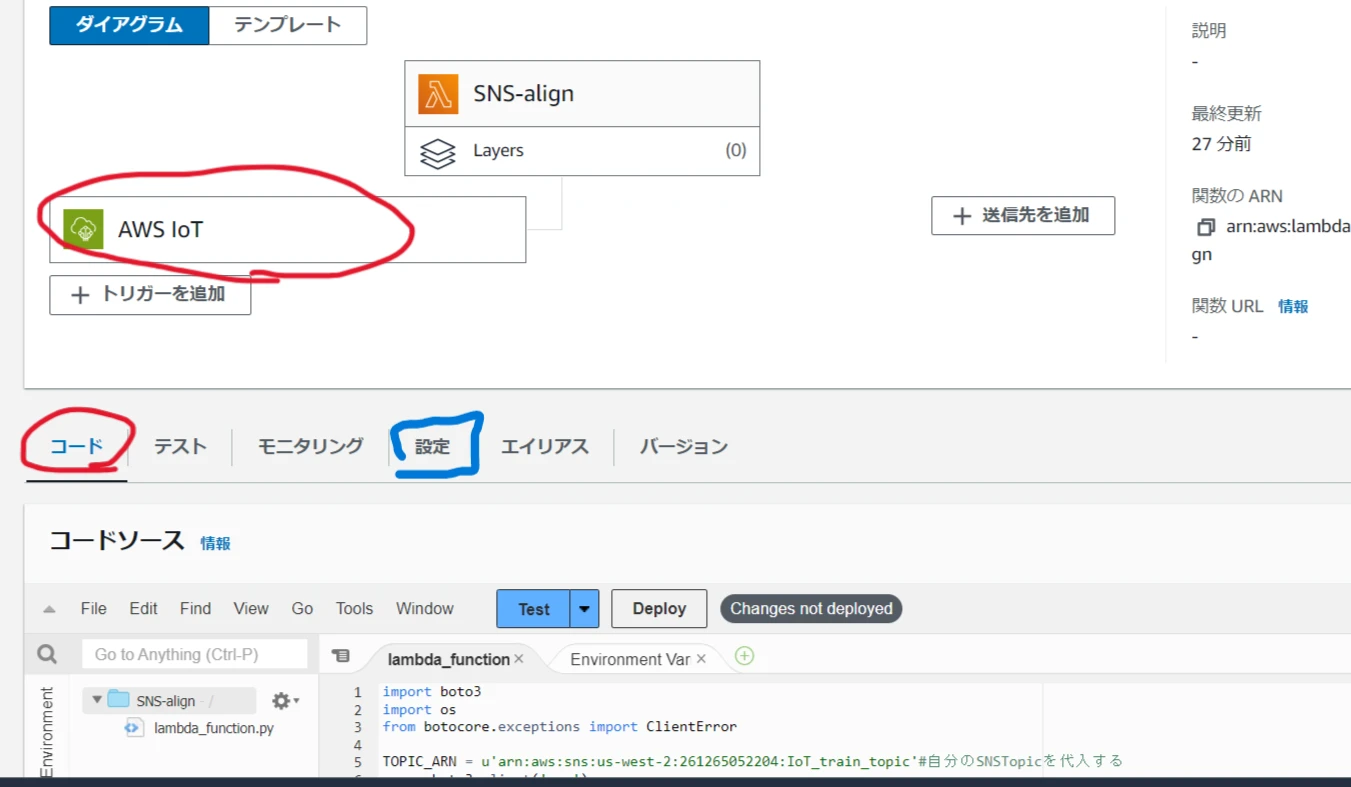
■参考コード
import boto3 import os from botocore.exceptions import ClientError
TOPIC_ARN = u’arn:aws:sns:us-west-2:261265052204:IoT_train_topic’#自分のSNSTopicを代入する sns = boto3.client(‘sns’) iot = boto3.client(‘iot-data’) temp_threshold =29
センサデータがしきい値を超え続けた時の、メール連投防止トリガー
Lambdaコンソール画面の設定から環境変数でトリガーを設定しておく。Alert_Triggerはstring
alert_trigger = os.environ[“Alert_Trigger”]
メールを設定し、送信する
def send_mail(arn,temp,time):
本文
msg = (u’室温が’+str(temp_threshold)+u’℃を超えています。\n’+str(time) +‘現在の室温は’+str(temp)+u’℃です。’)
件名
subject = u’暑い!!!’
request = { ‘TopicArn’: arn, ‘Message’: msg, ‘Subject’: subject } sns.publish(**request)
def lambda_handler(event, context): global alert_trigger print(alert_trigger) print(event) sensor = event[‘sensor’] temp = sensor[‘temp’] time_stamp = event[‘timestamp’]
if temp >= temp_threshold:
トリガーがTrueの場合のみ、メールを送る
if alert_trigger == “True”: try: send_mail(TOPIC_ARN,temp,time_stamp) alert_trigger = “False” os.environ[“Alert_Trigger”] = alert_trigger except ClientError as e: print(e.response[‘Error’][‘Message’])
しきい値を下回った時、トリガーを戻す
else: alert_trigger = “True” os.environ[“Alert_Trigger”] = alert_trigger
5.センサデータをAWSに送るプログラムを作成し、実行する
■ 実行プログラムの作成
#coding: utf-8
from bme280_get_data import BME280 import clientConfig as client import time from awsiot import mqtt5_client_builder from awscrt import mqtt5, http from concurrent.futures import Future
sensor = BME280()
MQTT5 クライアントの設定
TIMEOUT = 100 clientName = client.clientName endpoint_path = client.endpoint_path amazonroot_path = client.amazonroot_path privatekey_path = client.privatekey_path certificate_path = client.certificate_path
サブスクライブしたメッセージを受信したときのコールバック
def on_publish_received(publish_packet_data): publish_packet = publish_packet_data.publish_packet assert isinstance(publish_packet, mqtt5.PublishPacket) print(“Received message from topic ‘{}’: {}”.format(publish_packet.topic, publish_packet.payload))
ライフサイクルイベント: 停止
def on_lifecycle_stopped(lifecycle_stopped_data: mqtt5.LifecycleStoppedData): print(“Lifecycle Stopped”)
ライフサイクルイベント: 接続成功
def on_lifecycle_connection_success(lifecycle_connect_success_data: mqtt5.LifecycleConnectSuccessData): print(“Lifecycle Connection Success”)
ライフサイクルイベント: 接続失敗
def on_lifecycle_connection_failure(lifecycle_connection_failure: mqtt5.LifecycleConnectFailureData): print(“Lifecycle Connection Failure”) print(“Connection failed with exception: {}”.format(lifecycle_connection_failure.exception))
#クライアント情報を設定する def set_mqttclient(name=clientName,endpoint=endpoint_path,root=amazonroot_path,key=privatekey_path,certificate=certificate_path): mqtt5_client = mqtt5_client_builder.mtls_from_path( endpoint=endpoint_path, cert_filepath=certificate_path, pri_key_filepath=privatekey_path, ca_filepath=amazonroot_path, on_publish_received=on_publish_received, on_lifecycle_stopped=on_lifecycle_stopped, on_lifecycle_connection_success=on_lifecycle_connection_success, on_lifecycle_connection_failure=on_lifecycle_connection_failure, client_id=clientName, clean_start=True, keep_alive_secs=30 ) return mqtt5_client
if name == ‘main’: mqtt5_client = set_mqttclient() try: print(“Connecting to endpoint…”) mqtt5_client.start()
try: while True: messageJson = sensor.getMessage() print(f“Publishing message: {messageJson}”)
publish_future = mqtt5_client.publish(mqtt5.PublishPacket( topic=“your topic”, payload=messageJson.encode(), qos=mqtt5.QoS.AT_LEAST_ONCE )) publish_completion_data = publish_future.result(TIMEOUT) print(“Publish successful. PUBACK: {}”.format(publish_completion_data.puback.reason_code)) #pubbackは0が返れば成功 time.sleep(5) except Exception as e: print(f“Publish failed: {e}”) except KeyboardInterrupt: pass
※ インポートされている”clientConfig”は前々回記事の物と同じです。
このようなメールが届くはずです!!
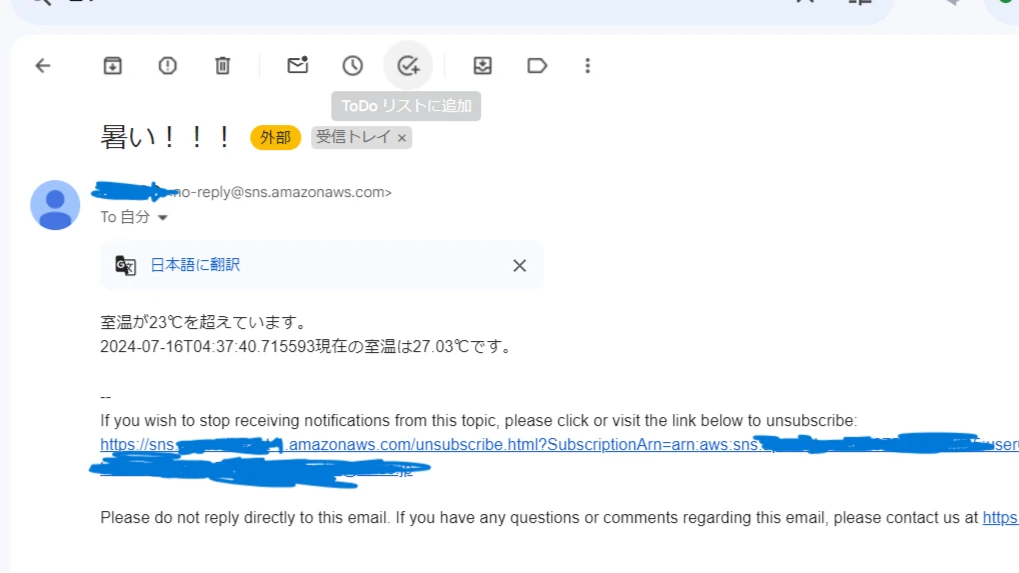
以上、AWS LambdaとAmazon Simple Notification Serviceを組み合わせて、センサデータに基づくメール通知アプリケーションを作ってみました!!
センサーデータからメールで遠隔地にアラート、最近浸透してきているシステムっぽいですよね!
次回はいよいよ、センサデータを使ってアクチュエータ制御をしていきます!